AVEDA MURAL
AVEDA MURAL
This mural is a relatively small mural, done in the massage/therapy room of the Prescott AZ Aveda salon. I wasn’t going to do a “painting progression” on it, but I learned some cool stuff, so here goes:
I had 3 problems dealing with the space and colors requested and subject matter. This is a small room, maybe about 10×12. My client wanted me to use as a reference a small poster that Aveda puts out. The poster was very dark, with massive rocks. The mural was to go on the back wall, plus about half way onto the side walls. If not done right it would make this already small room feel way more closed in. The second problem was the furniture. Some stuff was okay, but the room was just too cluttered with supplies from 3 therapists’ junk. As I started painting, I came up with yet another problem…the reflection in the mirror.
Check it out. In this image, I’d already started to correct the problem and was quite tickled with my solution.
 The massive rock that surrounds the mirror was one big rock. I got back to check the mural after painting the rock and went argh at the reflection of the sky in the mirror right smack in the middle of the rock. There was no getting around the bright pointy reflection and it looked dumb. Sooooo, the solution was to work with the reflection which actually turned out pretty fun! I divided the rock, and used the reflection of what you see when you first come into the door for my lines.
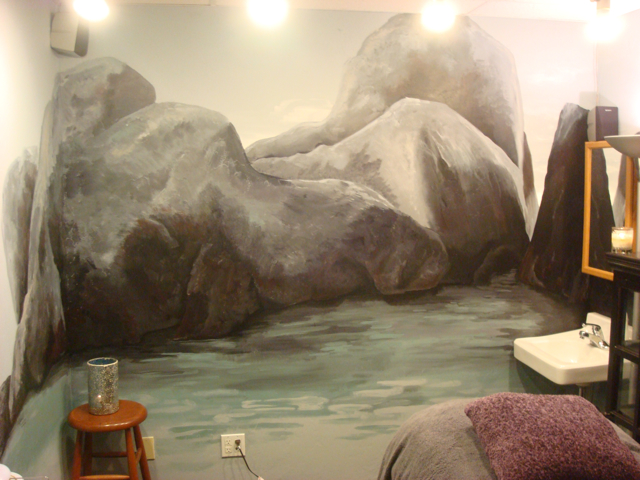
The other problems’ solutions, as you can tell from the finished mural below was to use the bookcases full of stuff as “framing” for where the mural would end. Then I put a couple of small rocks on the other side of the bookcase for…Im searching for a word…well to make the mural look good. I talked the therapist that had an ugly table that took up a lot of space right in the walking path, to slide over to my fave Second Hand Man store here in Prescott and find a cool piece of furniture for her stuff that would both look good and take up a smaller footprint in the room. This would be nice to frame the mural on the other side.
As for the massive dark rocks in a small room, what I did was make the water appear to go way back, giving the mural a lot of depth. I also did all I could to loose the 90 degree angle of the walls. This was easy enough to do with the rocks, but the water was another deal. It took 3 trys to get it right. The prob was, there are tiny riffles in the water to help imply water. Since water needs to appear flat and as gravity dictates, I could not have ANY riffles on the side wall, or it would loose it’s appearance of flatness. When done the room acutally looked larger, like it just went on and on! Problems solved. Here’s the finished product. Oh and one other thing that is kinda cool, when the 4 spotlights at the top are out and only one dim light illuminates the mural and room, it looks completely different, literally the difference between night and day. It’s very peaceful either way.
(OH AND WHEN I NEGOTIATED A PRICE FOR THIS MURAL, I MADE SURE I GOT A MASSAGE AND FACIAL THROWN IN WITH THE DEAL heehee. Schweet!)
This a fascinating piece Julie. It’s so interesting to have you explain the process and the problems, and the final picture looks so cool!